

Hair & Makeup Masterclass — Lecture 1: Skin Prep + Flawless Base (Miami-Proof, Camera-Ready)
If you want makeup that looks expensive, photographs beautifully, and survives heat, humidity, long events, and real life — it starts before foundation. This first lecture is the blueprint for building a base that looks like real skin, stays smooth for hours, and gives you control over shine, texture, and longevity.
Whether you’re booking clients as a Makeup Artist Miami or building your name as a Freelance Makeup Artist , this lesson locks in the fundamentals that separate “makeup that looks good for 20 minutes” from “makeup that holds up all day.”
Masterclass Series: We’re creating a complete 30-lecture Hair & Makeup Masterclass.
Mentorship Registration: Click here to register
Tip: Use the cover image as your WordPress “Featured Image.” The two images below are designed to embed inside the post.
Table of Contents
- What You’ll Learn in Lecture 1
- The #1 Rule: Base = Skin Prep + Strategy
- Consultation: How Pros Decide the Base
- Skin Type Playbook (Oily, Dry, Combo, Mature, Acne-Prone)
- Miami-Proof Longevity: Heat, Humidity, Sweat
- Step-by-Step: Skin Prep That Actually Works
- Primer + Foundation Pairing (No Pilling)
- Application: Thin Layers, Seamless Finish
- Concealer & Color Correction Without Caking
- Set + Lock: Powder, Spray, Touch-Ups
- Common Base Mistakes (and Fixes)
- Practice Drills (Homework)
- FAQ
- Register for Mentorship
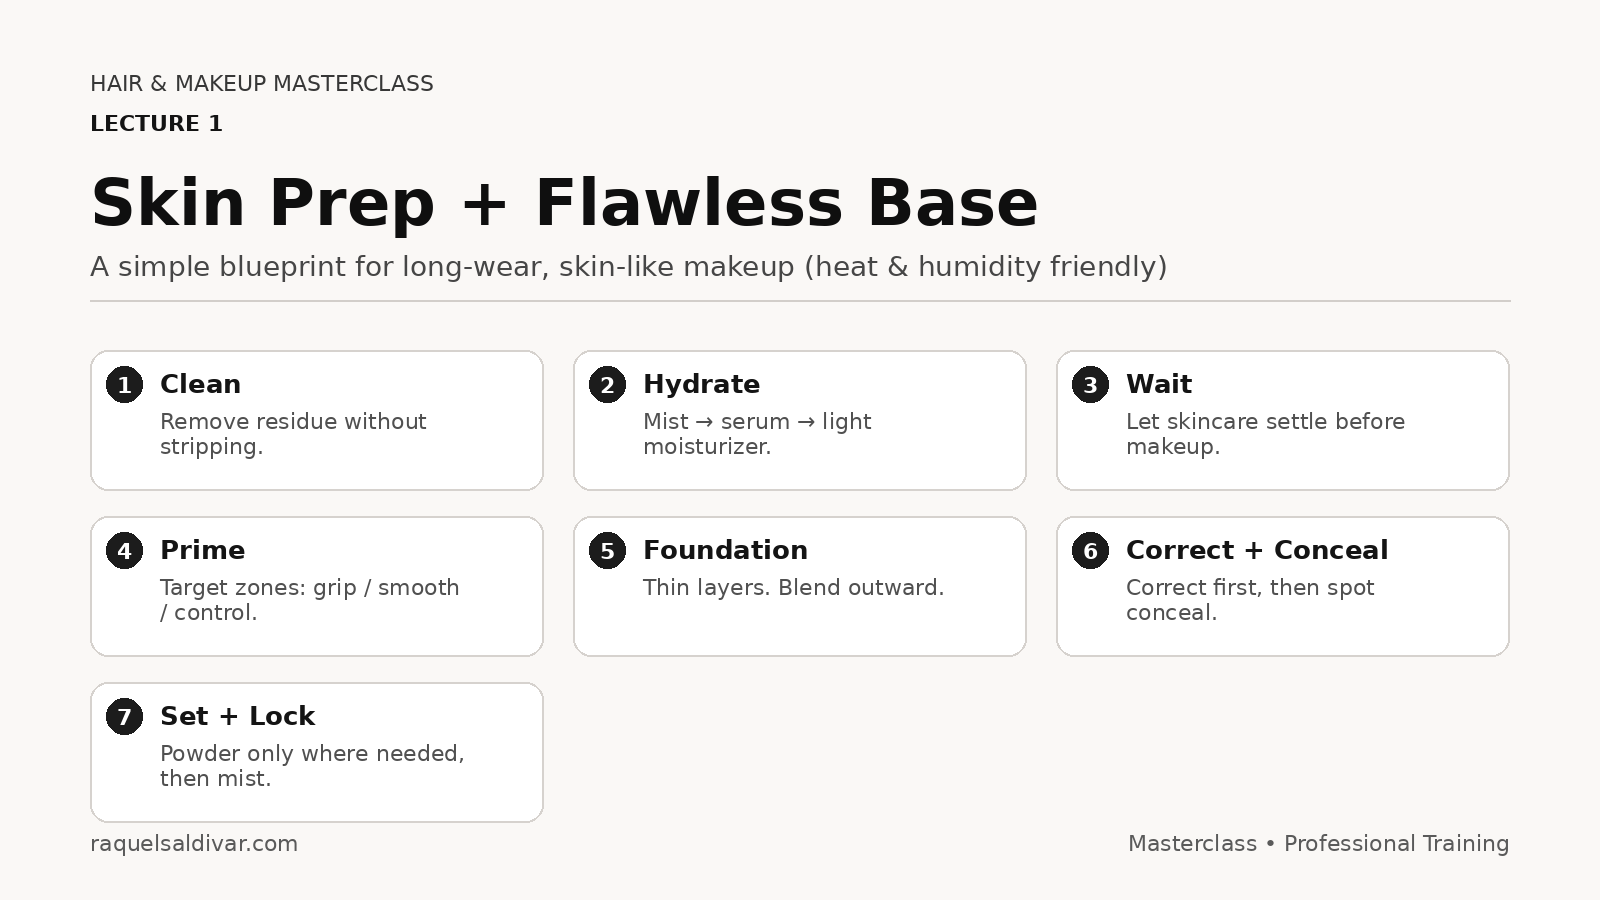
What You’ll Learn in Lecture 1
- How to prep skin so foundation looks like skin (not makeup sitting on top).
- The pro decision process: choosing finish, coverage, and longevity based on the client + environment.
- How to stop common issues: pilling, separation, patchiness, flashback, and cakey under-eyes.
- Exactly how to layer products (and why most layers are too thick).
- A heat/humidity method that stays polished without looking powdery or heavy.
Real talk: if your base is wrong, no amount of bronzer, lashes, or lipstick can save the look. The base is the look.
The #1 Rule: Base = Skin Prep + Strategy
Most people assume a flawless base means “better foundation.” That’s why they keep buying more products and still get the same problems: patchy forehead, texture on cheeks, separating nose, creasing under eyes, and makeup sliding by hour two.
A professional base comes from two things:
- Skin behavior (oil production, dehydration, texture, sensitivity, pores, acne, pigmentation).
- Event reality (heat, humidity, lights, photography, duration, tears/sweat, touch-ups, wardrobe, schedule).
When you understand those two factors, your product choices become obvious — and your results become consistent.
Client Consultation: How Pros Decide the Base
If you want to be trusted like a pro, you need a repeatable consultation flow. It keeps your results consistent and makes clients feel taken care of. This is the same logic taught in serious training environments like Makeup School Miami programs — except we’re making it practical and real-world.
Step 1: Ask the Questions That Actually Matter
- Skin type today: oily, dry, dehydrated, combination, sensitive?
- Skincare & treatments: retinol, acids, recent facial, peel, microneedling (these change how makeup sits).
- Allergies: fragrance, SPF filters, latex, adhesives, certain ingredients.
- Environment: indoor/outdoor, heat/humidity, flash photography, stage lights.
- Time: when you start vs. when it needs to still look perfect.
- Finish preference: skin-like, soft glam, matte, radiant, full coverage.
Step 2: Do a 10-Second Skin Scan
Natural light is best. Look for flaking, dehydration lines, congestion, redness, hyperpigmentation, enlarged pores, and the areas that usually separate (nose, around mouth, forehead). You’re not judging — you’re diagnosing.
Step 3: Decide Your Base Strategy
Strategy means deciding your hydration level, grip, finish, and setting plan. You’re not “doing makeup.” You’re engineering wear-time.
Pro phrasing clients love:
“I’m going to hydrate where you’re dry, control shine where you get oily, and use a thin-layer foundation technique so your skin looks real in photos.” That sentence alone upgrades your perceived value.
Skin Type Playbook (Your Base Should Change)
Oily Skin: Shine Control Without Heavy Matte
Oily skin doesn’t need “more powder.” It needs balanced hydration and targeted control. Over-matting can trigger rebound oil and make texture look harsher in photos.
- Use lightweight hydration (don’t skip it).
- Control only the zones that need it (usually T-zone).
- Apply foundation in thin layers and lock it in at the end.
Dry / Dehydrated Skin: The “Flaky Foundation” Fix
Dry skin needs prep time. If you rush, foundation clings to texture and looks older. The goal is to plump and smooth before coverage.
- Hydrate in layers: mist → serum → moisturizer.
- Let skincare absorb before complexion products.
- Set only where needed (often very minimal).
Combination Skin: Different Zones, Different Rules
Combo skin is where you become a true pro: hydrate cheeks more, control the center, and blend strategy so the finish stays seamless.
Mature Skin: Lifted, Fresh, Not Over-Set
Mature skin looks best when it’s thin, flexible, and softly luminous. Too much product creates creases and emphasizes lines. Think “strategic coverage,” not heavy layers.
Acne-Prone / Textured Skin: Coverage Without Cracking
Texture doesn’t need thick foundation — it needs smart placement. Use thin layers and pinpoint correction. Heavy product makes bumps more visible.
Miami-Proof Longevity: Heat + Humidity Method
In humid climates, makeup fails in predictable ways: separation around the nose, sweating through the upper lip, shine breaking through the forehead, and product sliding off where the skin gets hot. The fix isn’t “more product.” It’s the right layers, applied in the right order.
The Longevity Triangle
- Hydration so skin doesn’t drink foundation unevenly.
- Grip so makeup bonds instead of floating.
- Lock so sweat/humidity doesn’t break the makeup film.
Humidity rule: skip hydration = patchiness, skip grip = sliding, skip lock = separation.
Register Now for Personalized Training with Raquel
Ready to level up with a personalized training session? Register now to schedule your next session with Raquel. Click below to register, and one of our representatives will contact you to confirm the details.
Great for beginners, working artists, and anyone who wants real feedback, real technique, and results that hold up in real life.
Click Here to RegisterAfter you register, our team will reach out to schedule your session and answer any questions.
Step-by-Step: Skin Prep That Actually Works
Step 1: Clean, Don’t Strip
Start with clean skin. If there’s residue from heavy skincare, sunscreen, or oils, remove it gently. Stripping creates dehydration, and dehydration creates texture.
Step 2: Hydrate in Layers (Not One Thick Cream)
Hydration is not “one heavy moisturizer.” That can sit on top of the skin and cause sliding. Instead, build hydration like this:
- Mist/toner: a light water-binding layer.
- Serum: targeted hydration for dehydration lines and balance.
- Moisturizer: seal it in (thin layer).
Step 3: Timing (You Need a Pause)
Give skincare a few minutes to settle before primer/foundation. If you apply makeup onto wet skincare, you’re mixing formulas and creating separation.
Step 4: Spot-Prep Trouble Areas
Treat zones differently:
- Dry patches: extra hydration, avoid heavy powder later.
- Oily T-zone: oil control only where needed.
- Large pores: smoothing only in pore zones.
- Redness: calm and correct before coverage.
Primer + Foundation Pairing (No Pilling)
Pilling usually happens because layers don’t agree or the skin is too slick. The simplest rule: don’t over-apply primer, and don’t layer onto skincare that hasn’t settled.
Primer Types & When to Use Them
- Hydrating primer: dry/dehydrated skin; adds flexibility.
- Gripping primer: long events and humid conditions; helps layers bond.
- Smoothing primer: pores/texture zones only.
- Mattifying primer: oily T-zone only, not the whole face.
Application: Thin Layers, Seamless Finish
Most people apply too much foundation, then spend the rest of the appointment trying to fix the thickness. Start sheer, press layers in, and build coverage only where necessary.
Set + Lock: Powder, Spray, Touch-Ups
Setting is about control. Locking is about longevity. Over-setting can make skin look older and emphasize texture — so keep it strategic.
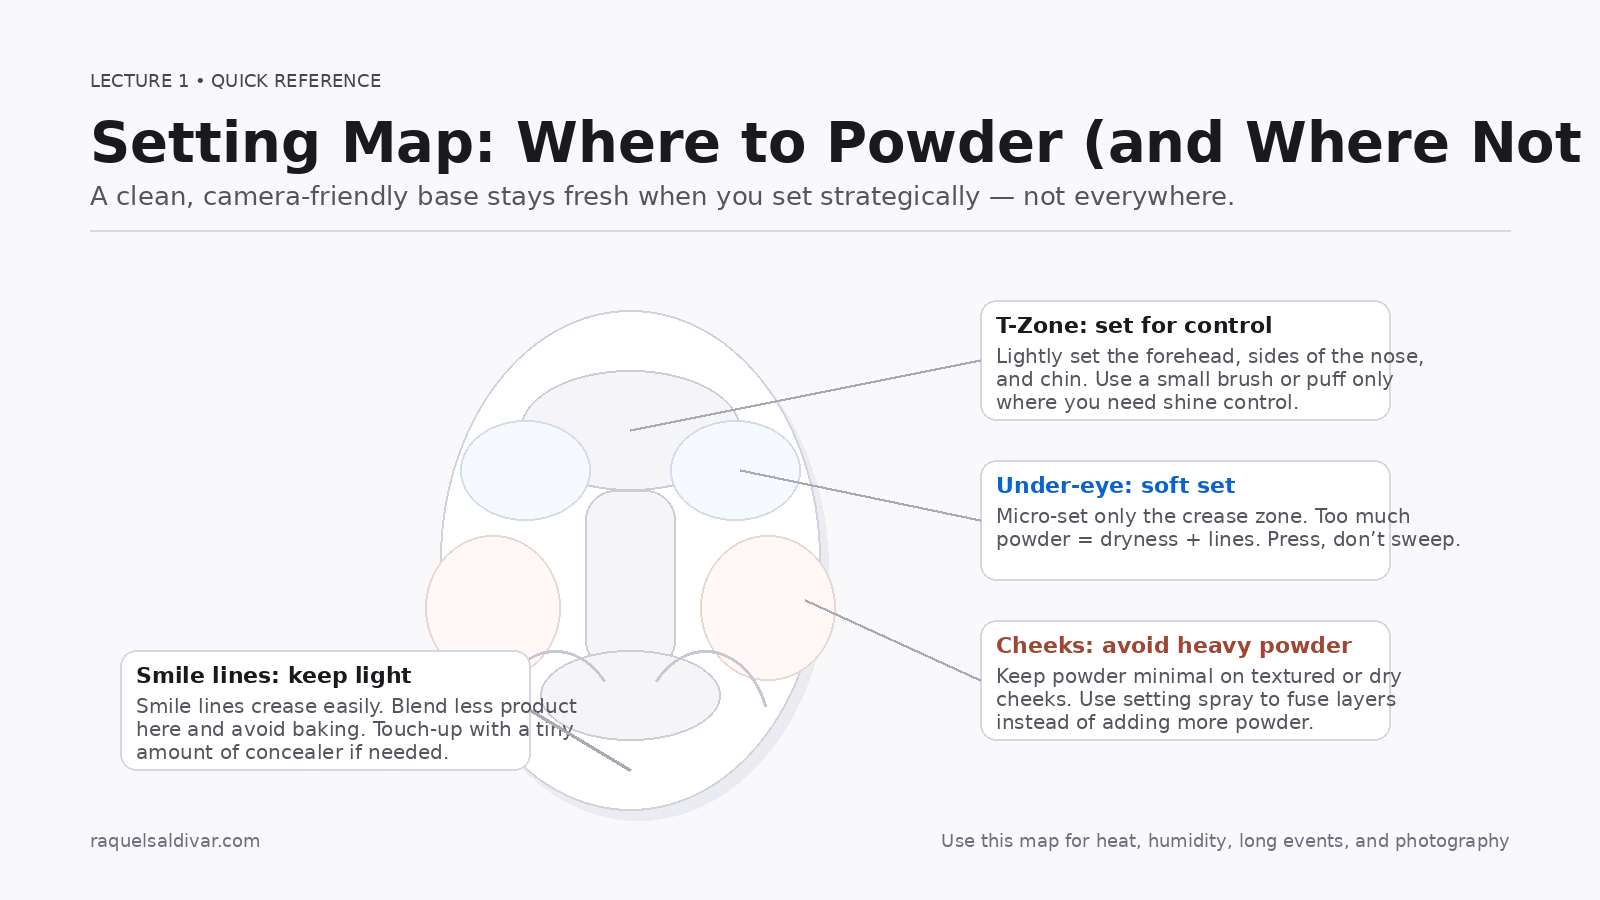
Strategic Powder Map
- Powder here: sides of nose, center forehead, chin, under-eye (lightly).
- Powder less / avoid: dry patches, textured cheeks, deep smile lines.
Register for Mentorship
Want direct feedback and personalized training? Register here and one of our representatives will contact you:
You’ll build technique, confidence, and a repeatable system — so your work looks flawless in person and on camera.
Educational content only. For persistent irritation or skin conditions, consult a qualified professional.

Comments are closed