

Hair & Makeup Masterclass — Lecture 2: Color Matching & Undertones (Foundation That Looks Like Real Skin)
A flawless base isn’t only about coverage — it’s about color. The quickest way to make makeup look “off” in person or on camera is a foundation shade that’s too pink, too yellow, too gray, or that oxidizes into a totally different color after 10 minutes.
In this lecture, you’ll learn a repeatable system to match skin accurately, correct discoloration without caking, and check your work in lighting that actually matters. This is one of those skills that instantly upgrades you as a Makeup Artist Miami — because when clients see that their foundation “disappears,” they trust you.
Masterclass Series: This is Lecture 2 of a 30-lecture Hair & Makeup Masterclass.
Mentorship Registration: Click here to register
Tip: Use the cover image as your WordPress “Featured Image.” The two images below are designed to embed inside the post.
Table of Contents
- What You’ll Learn
- Undertone vs Overtone (and Why People Get Confused)
- How to Identify Undertone Fast
- Shade Matching: The Professional Method
- Oxidation: What It Is and How to Prevent It
- Color Correction Without Caking
- Lighting & Photography Checks (Real-World Rules)
- Custom Mixing (How Pros Nail the Match)
- Common Mistakes (and Fixes)
- Practice Drills
- FAQ
- Register for Mentorship
What You’ll Learn in Lecture 2
- How to identify undertone quickly (without guessing).
- The exact jawline matching method that prevents “mask face.”
- How to handle oxidation so the shade stays true all day.
- Color correction rules for redness, dark circles, hyperpigmentation, and spots.
- Lighting checks so your work looks good in daylight, flash, and indoor lighting.
Real talk: A perfect blend doesn’t matter if the color is wrong. Color match is the quiet difference between “nice makeup” and “professional makeup.”
Undertone vs Overtone (and Why People Get Confused)
Overtone is what you see on the surface — like redness, tan, dullness, or hyperpigmentation. Undertone is the consistent hue underneath the skin that doesn’t change as dramatically. Most shade mismatches happen when someone matches to overtone (like redness) instead of undertone.
Example: if someone has surface redness but a warm undertone, using a cool/pink foundation can make them look even more irritated. The better move is to keep the foundation true to undertone, then correct the redness with a targeted technique.
How to Identify Undertone Fast
You don’t need a complicated “vein test” to be accurate. Use multiple quick indicators and let them confirm each other. Here are the ones that work most reliably in the real world:
1) The Drape Test (Fastest and Most Accurate)
Hold a clean white towel (or white shirt) near the face, then hold something warm-toned (like tan/beige) near the face. Watch what happens to the skin:
- If warm tones make the skin look healthier and brighter → likely warm/olive undertone.
- If cool tones make the skin look clearer and smoother → likely cool undertone.
- If both look fine and neither “wins” strongly → likely neutral.
2) The Neck + Chest Match Check
Many faces are redder than the neck/chest from heat, skincare, sun, or sensitivity. The goal is a match that blends face into neck/chest seamlessly. This is why jawline testing matters more than matching the cheek.
3) The “Too Pink / Too Yellow / Too Gray” Rule
- If foundation reads pink and the skin looks irritated → shift warmer/neutral.
- If foundation reads yellow and the skin looks dull → shift neutral or slightly cooler.
- If foundation reads gray/ashy → add warmth or choose a different undertone family.
Shade Matching: The Professional Method
Matching is a process, not a guess. This is also a core skill taught in serious training programs — especially for artists coming up through hair and makeup school Miami style training — because clients will forgive a lot, but they won’t forgive looking orange or ashy in photos.
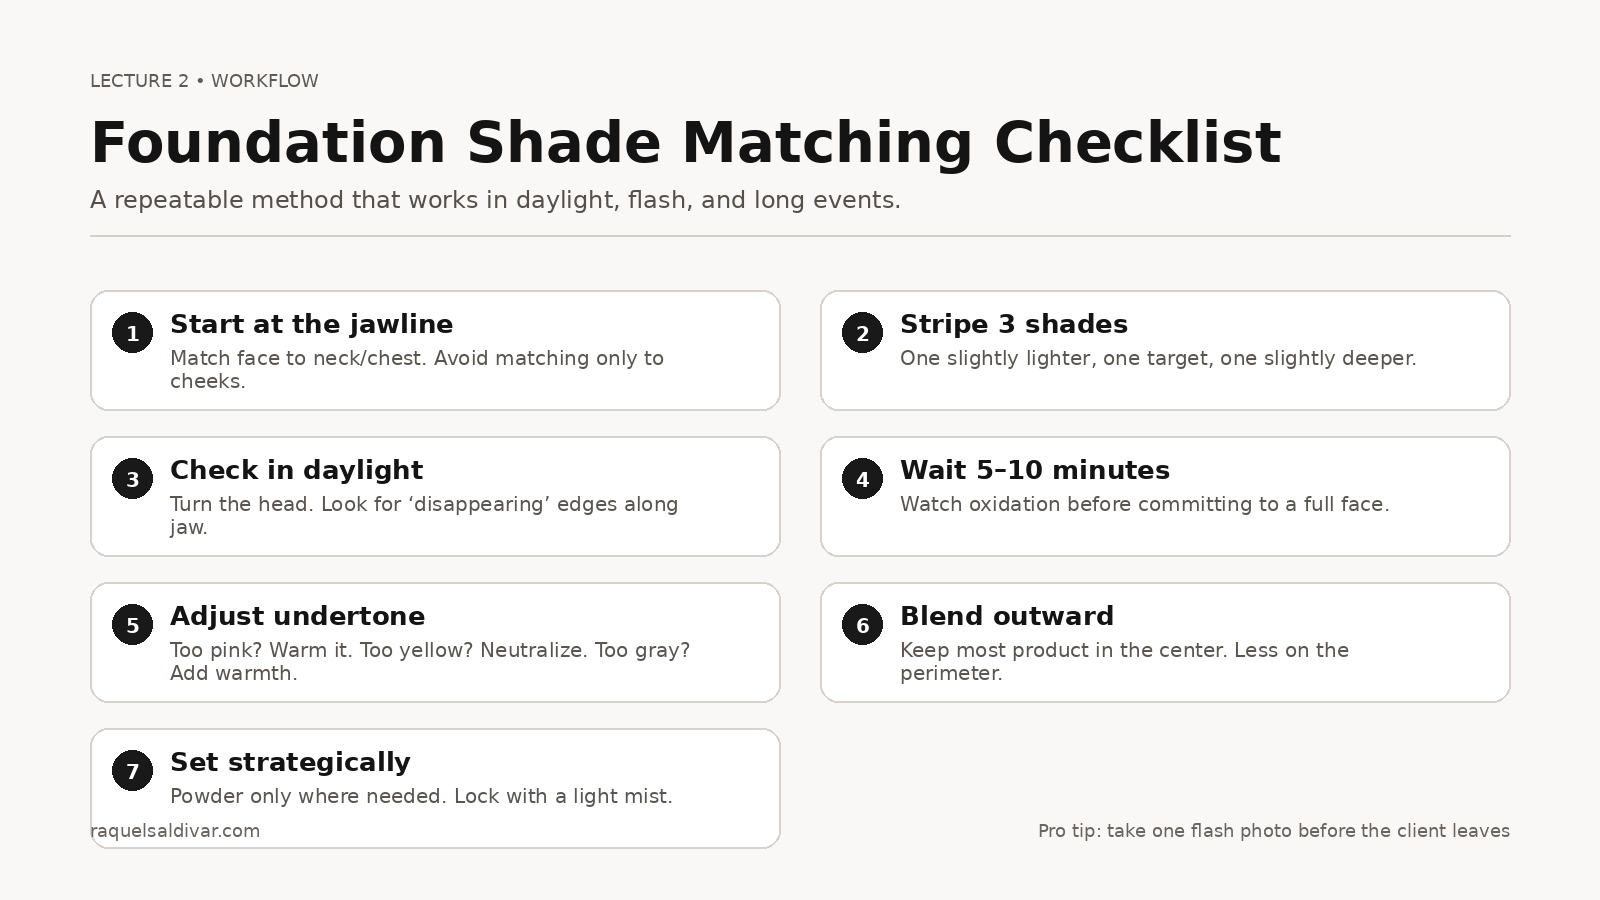
Step 1: Always Start at the Jawline
Apply small stripes across the jawline, extending slightly onto the neck. The best match will “disappear” at the edge. If the face looks separated from the neck, the match is wrong — even if it looked okay on the cheek.
Step 2: Test Three Shades (Not One)
Always test one slightly lighter, one target shade, and one slightly deeper. This gives you context. Often the perfect match is between two shades — which is where mixing comes in (we’ll cover it below).
Step 3: Check in Daylight, Then Indoor Light
Daylight exposes undertone issues quickly. Indoor light can hide them. If possible, check both. For bridal, events, or professional shoots, take a quick photo test too.
Oxidation: What It Is and How to Prevent It
Oxidation is when foundation deepens or changes tone after it sits on the skin. It can be caused by oil, heat, product interaction, or the formula itself. You don’t “hope it won’t oxidize.” You test for it.
The Simple Oxidation Test
- Apply your test stripes on the jawline.
- Wait 5–10 minutes.
- Check again in daylight.
- If it turns darker/orange, choose a different shade or adjust your prep and set plan.
How to Reduce Oxidation
- Use balanced hydration (overly oily skin can speed oxidation).
- Use a light, targeted set in oil-prone zones.
- Avoid stacking too many creamy layers in the same spot.
- Lock with a light mist (don’t soak).
Register Now for Personalized Training with Raquel
Want real feedback on your color matching and base technique? Register now to schedule your next personalized training session with Raquel. Click below to register, and one of our representatives will contact you to confirm the details.
Click Here to RegisterAfter you register, our team will reach out to schedule your session and answer any questions.
Color Correction Without Caking
Corrector is powerful, but only when used in small amounts. The goal is to neutralize discoloration so you can keep foundation layers thin. This is a skill that makes you look instantly more professional — especially if you’re building a curriculum like makeup school Miami training, where technique has to work across many skin tones and textures.
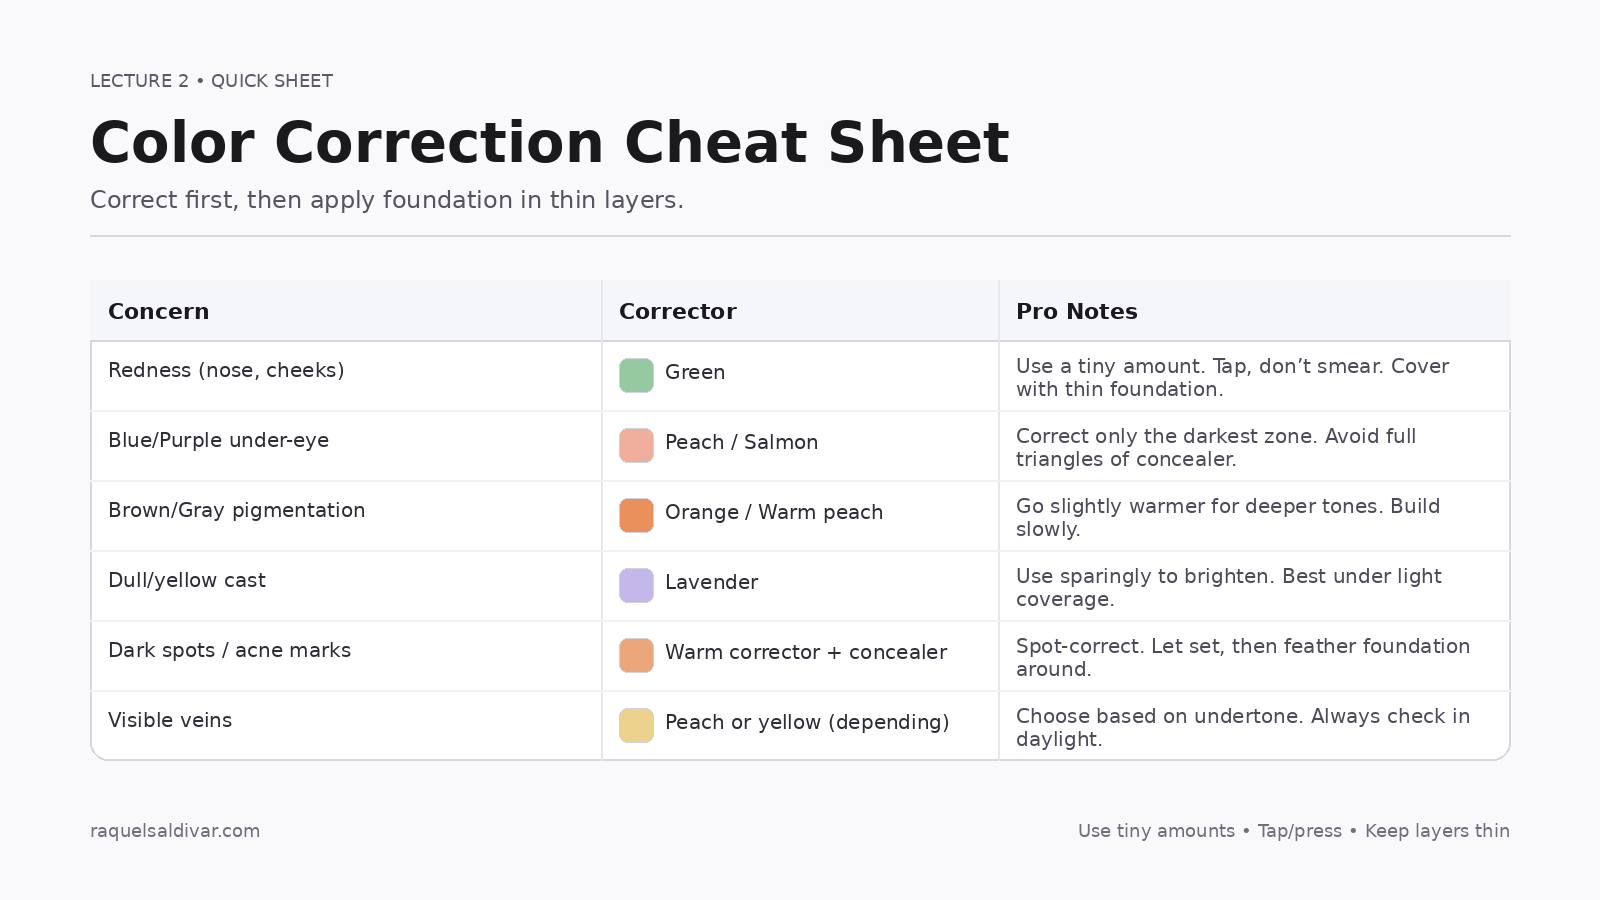
The “Tap, Don’t Smear” Rule
Smearing corrector spreads pigment where you don’t need it and creates thickness. Instead, use a small brush or fingertip to tap product only on the discolored zone, then feather the edges.
Order of Operations (So It Doesn’t Cake)
- Correct only the discolored zone.
- Let it set for 20–30 seconds.
- Apply foundation in a thin layer around and over (don’t flood it).
- Spot conceal only where needed.
- Set strategically (not everywhere).
Lighting & Photography Checks (Real-World Rules)
Lighting changes everything. A match that looks fine in a warm bathroom can look completely wrong in daylight or flash. Here’s the practical rule set:
- Daylight: best for undertone accuracy.
- Indoor warm light: can hide mismatches and make warm shades look “fine” when they’re not.
- Flash: can exaggerate texture and reveal undertone mistakes fast.
For events and shoots, take one quick photo test after base is done. If anything looks off, adjust with the smallest fix possible.
Custom Mixing (How Pros Nail the Match)
Many perfect matches are created — not found. Mixing is common, especially when you’re working with olive undertones, in-between shades, or when someone’s face and neck differ.
The Safe Mixing Rules
- Mix small amounts on a palette first (not on the face).
- Keep track of your ratio (example: 2 parts shade A, 1 part shade B).
- Test the mix on the jawline, then wait for oxidation.
- When in doubt, match slightly closer to neck/chest for a seamless result.
Common Mistakes (and Fixes)
Mistake: Matching only to cheeks
Fix: match at the jawline and blend into neck/chest for a natural transition.
Mistake: Not waiting for oxidation
Fix: always wait 5–10 minutes before committing.
Mistake: Correcting too broadly
Fix: correct only the discolored zone, then feather edges.
Practice Drills
Drill 1: Undertone Confirmation
Test undertone using the drape method, then confirm with a jawline match test. Take a daylight photo. Write down what you noticed: too pink? too yellow? too gray?
Drill 2: The 3-Stripe Challenge
Stripe 3 shades on the jawline. Wait 10 minutes. Identify which one disappears most naturally. Repeat on two different models (different undertones).
FAQ
What if the face is darker than the neck?
Match for a seamless blend into neck/chest, then warm up with bronzer where appropriate. Avoid making the face look like a different person from the neck.
How do I avoid looking gray on deeper skin tones?
Gray usually means the undertone is wrong (too cool/ashy). Shift warmer or use a foundation line that supports richer undertones.
Register for Mentorship
Want direct feedback on color matching and complexion technique? Register here and one of our representatives will contact you:
We’ll help you build a repeatable system that looks flawless in person and on camera.
Educational content only. For persistent irritation or skin conditions, consult a qualified professional.

Comments are closed